Design Your Own Officially Licensed Disney Race Shirt
Disney races are back! The successful Wine and Dine Half Marathon weekend took place during the first weekend of November; a full schedule of three more race weekends is slated for the rest of the season. If you're looking to run a future Disney race, you could consider creating a custom, officially licensed t-shirt for the run.
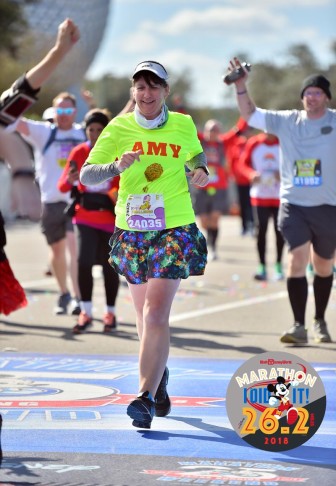
For my first full marathon, the final race during the 2018 Dopey Challenge at Walt Disney World, I decided to wear a shirt with my name boldly printed on the front. I got an obnoxious neon greenish yellow tech top with the balloons from the Pixar movie UP printed on the front and back. On the back I added the slogan 26.2 Miles of Adventure are Out There.
I purchased my shirt from Zazzle, a Print-on-Demand company that partners with artists and content creators to offer unique designs on apparel and other merchandise. The partners range from individual artists to brands like Disney.
Using Zazzle's tools with officially licensed Disney art, it's possible for anyone to make a custom shirt like the one I wore during my first marathon. In my case, I found this shirt on Zazzle and made changes to it for my race day outfit.
Here's a quick tutorial to show how to do it. Note that these instructions refer to using a desktop computer; the mobile platform instructions are similar but not recommended for making fine edits.
1. Visit Disney's Zazzle Store
2. Find Your Favorite Disney Character or Design
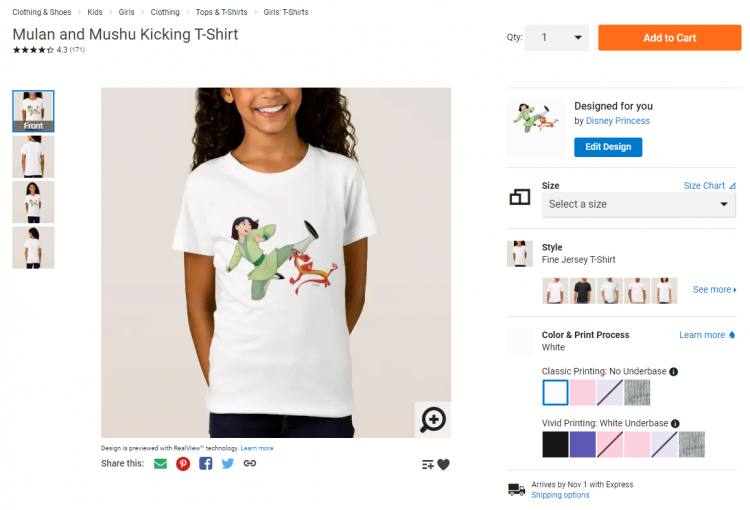
In this example, let's pretend we're looking for something to wear for the Disney Princess Half Marathon Weekend next February. For the half marathon, we can find a design featuring Mulan, the princess who appears on that race's medal. From the Disney Princess shop, we can search for Mulan and pick out our favorite design.
I like this image of Mulan and Mushu kicking.
3. Customize the Shirt with Text & More
But I'll need that on an athletic shirt, in an adult size. And I want to add my name, and maybe some other fun text. I can use the blue "Edit Design" button to start making changes.
On the editing page, I can move Mulan and Mushu around, make them bigger or smaller, and add text. Note that sometimes elements cannot be moved or adjusted. In this case, the Disney copyright text cannot be moved.
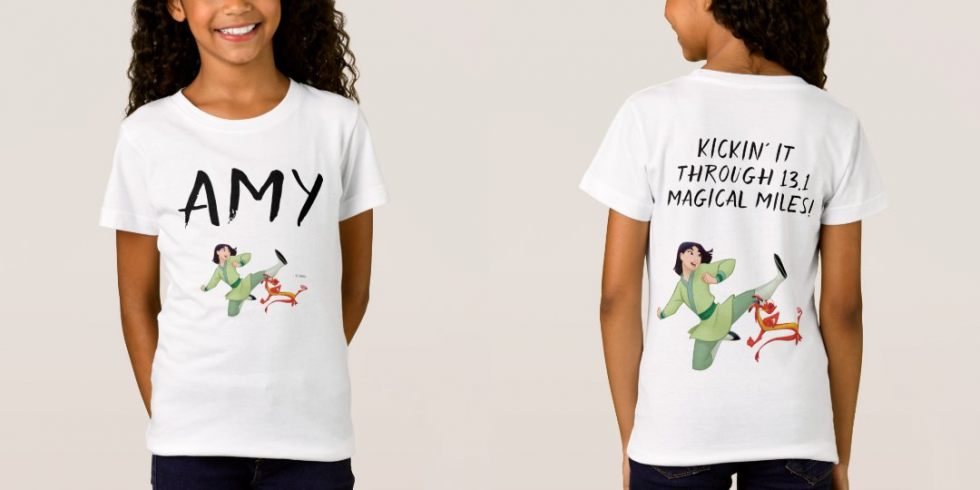
I used the tools to copy/paste the image onto the back. I added my name in large text on the front, and a motivational phrase over the image on the back. I picked out a font style that I thought goes well with Mulan. I could have changed the font color, but I left it black. Here's what my design looks like so far.
Design tip: When you're designing your own shirt for a race, remember that you'll have to wear a bib! Be aware of your design placement to avoid covering up elements you want visible on race day.
4. Pick Your Apparel Style
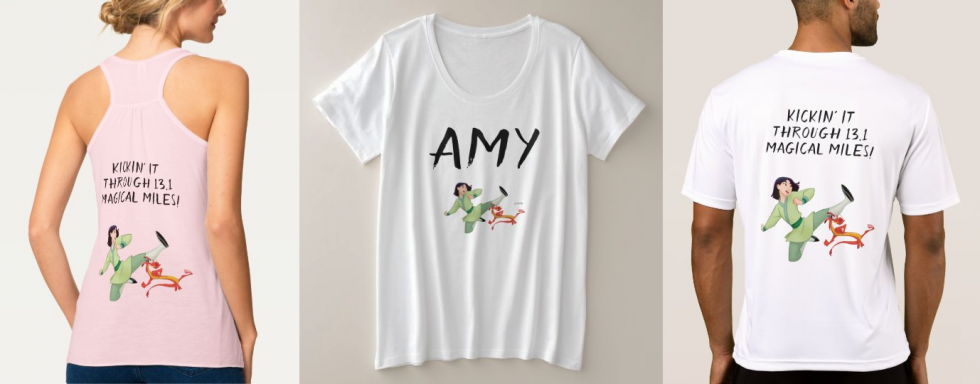
After customizing the design, the final step would be to pick out the right apparel type for your needs. Click on See more under Style to see all of Zazzle's apparel options. Right now, Zazzle is offering a unisex Sport Tek moisture-wicking shirt, several styles of cotton shirt, and a few tank tops, in addition to other styles like sweatshirts and hoodies. You can click on as many styles as you like to see what they would look like.
That's it!
You can pick out your shirt style before you make your customization choices -- it's okay to do step 4 above before step 3.
Once you have your custom design ready on the product of your choice, check if Zazzle has any coupons or promotions to apply, then make your purchase!
It's fun to dress up specifically for themed races, whether you're putting on a full costume, wearing a hybrid "bounding" style look, or wearing a special t-shirt made just for race day.
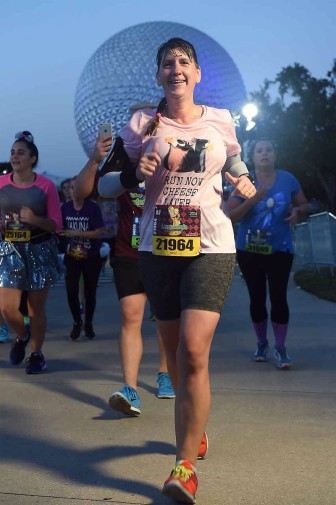
Like the marathon shirt I showed you at the top of this post, I used Zazzle's tools to customize another shirt for a different race day. I added the phrase RUN NOW CHEESE LATER, a play on "Run Now, Wine Later", to a Ratatouille t-shirt for the inaugural Wine & Dine 10K back in 2016, which featured Remy as the medal character.


Comments
Be the first to comment
Thank you!